Last updated September 16, 2024
Get started with the basic practices that can support digital accessibility across various platforms, including documents, websites, and mobile apps.
Download the checklist
Download our digital accessibility fundamentals checklist PDF to help you keep track of the core principles of accessibility while creating and editing digital resources.
What is web accessibility?
The W3C states that to be accessible, web content must be:
- Perceivable – Can I tell it’s there?
- Operable – Can I use this?
- Understandable – Do I know what’s being conveyed and what happens next?
- Robust – Are we considering long-term accessibility and compatibility with a wide variety of devices?
Read more about the Accessibility Principles on w3.org.
Titles and headings
Titles and headings help people understand and navigate a document or website. Good headings give structure to the content, help all users find the information they need, and support scanning a document or searching with keywords. Using HTML heading tags or applying heading styles from the styles panel in document editors like Microsoft Word will create an outline that screen reader users can use to quickly navigate through content.
Headings are ranked by importance from heading level one (h1) through heading level six (h6). Only use one h1 level heading for the title of a document or webpage, with exceptions for documents that contain more than one title. Headings should be nested by their rank from h1 to h6. Skipping heading levels can cause confusion, for example following an h2 level heading with an h4, and should be avoided.

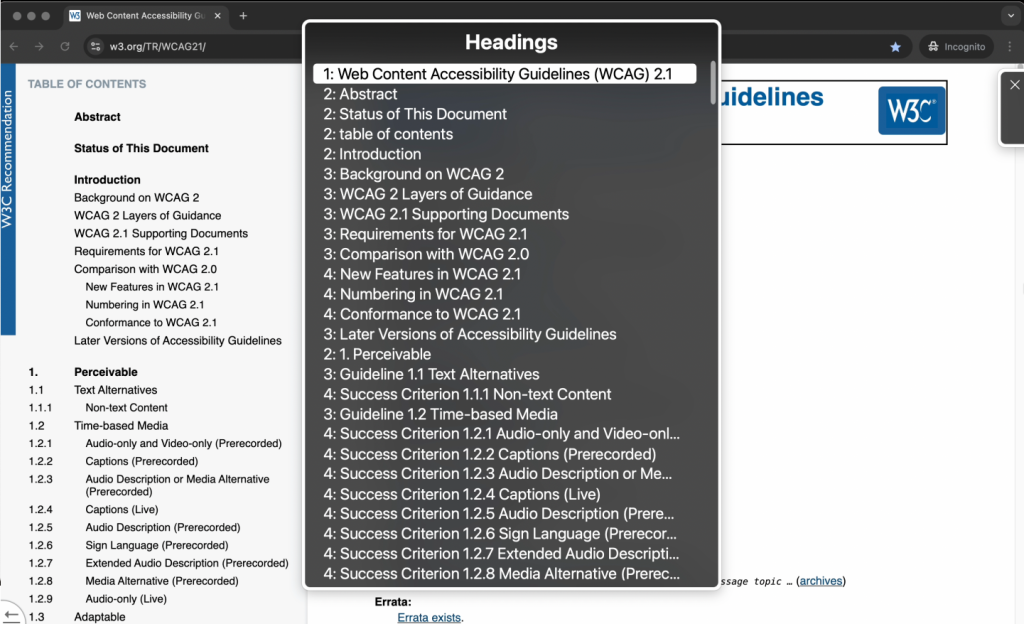
- Add a unique title to your website or document that matches the content of the page
- Use one h1 level heading for the title of a document or webpage
- Use headings in order from h1 through h6 without skipping levels
Color contrast
People perceive and distinguish colors in different ways, so digital content needs to have sufficient color contrast and use visual indications other than color to be effective.
Minimum contrast ratios:
- Normal-size text – 4.5:1
- Large text (18+ pt font) – 3:1
- UI elements like icons, buttons, text boxes – 3:1
- Check the contrast of text and other elements
- Avoid using images behind text because it can be distracting and make the text more difficult to read
- Use a solid-color background to get a better contrast ratio with text
- Avoid relying on color to convey information
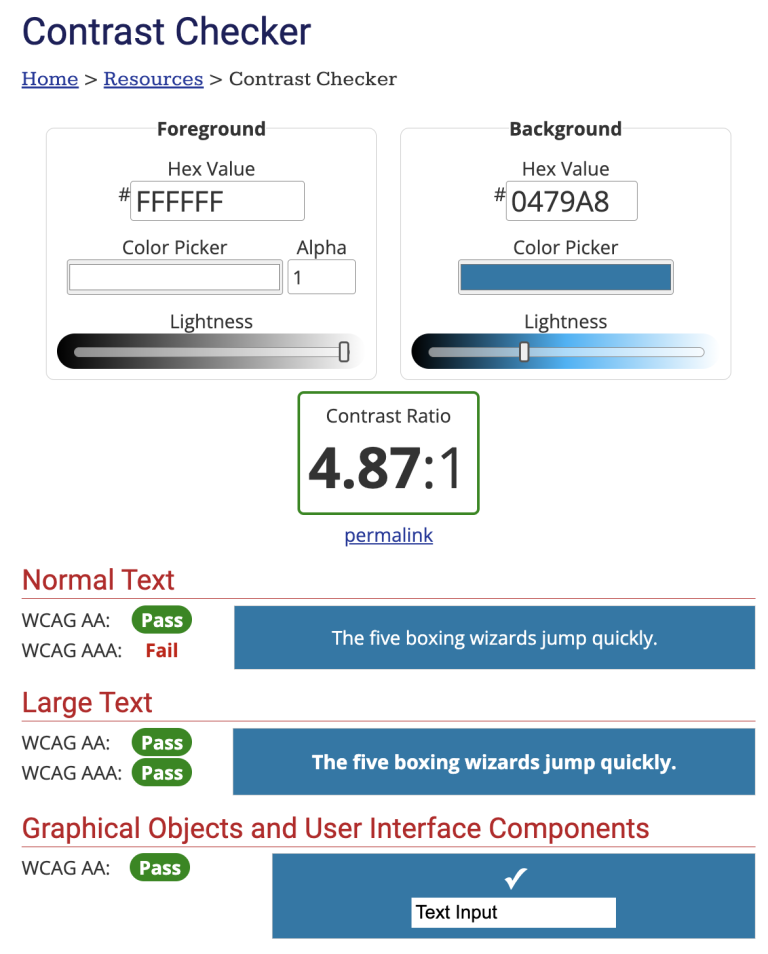
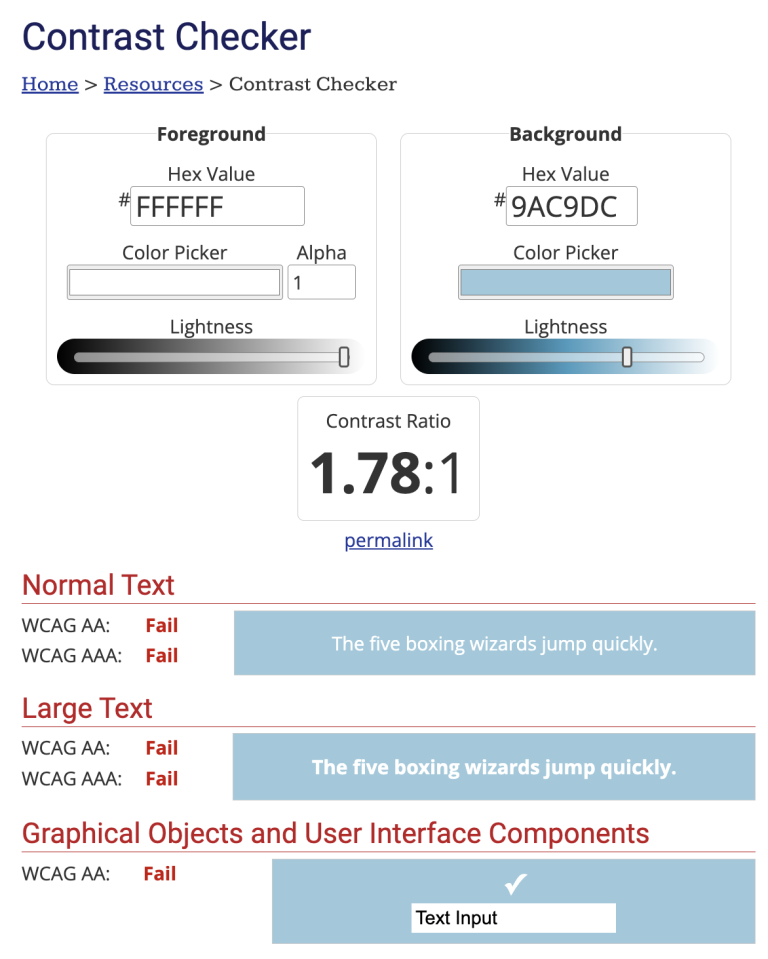
Use a tool like the WebAIM contrast checker to test the contrast ratio of your content. The following images show the contrast checker results for two blue buttons. The darker blue button meets WCAG AA standards, while the lighter blue button fails to meet those standards.


Even if text and element colors are distinguishable from the background, they may not always be distinguishable from each other. Avoid relying on color alone to communicate quick information, and include other indicators like text labels, patterns, and shapes.
Text styling
The fonts we use greatly affect the legibility of a website or document. Overuse of text styles reduces the legibility of text. Keep text styling simple, with minimal bolding, italics, underlines, and capitalization. Use common, preferably sans serif fonts for paragraph text, and try to use no more than 3 different fonts in a design or document.
- Use plain, preferably sans serif fonts for paragraph text
- Use at least 12 pt font
- Keep text styling simple
- Apply title case and sentence case when appropriate; never use all-caps
Magnification
Many people will magnify the screen to support low vision or reading on a smaller screen.
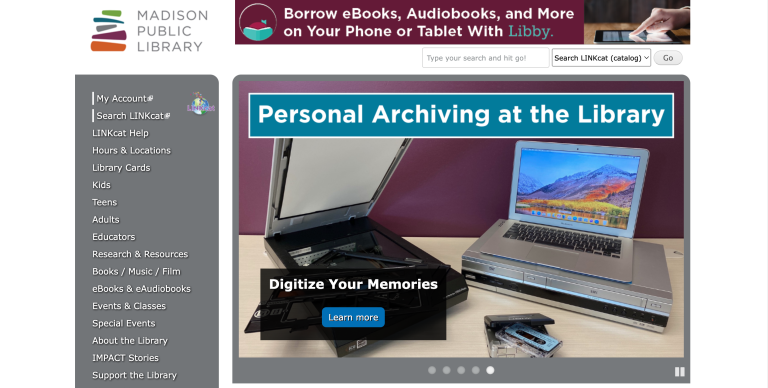
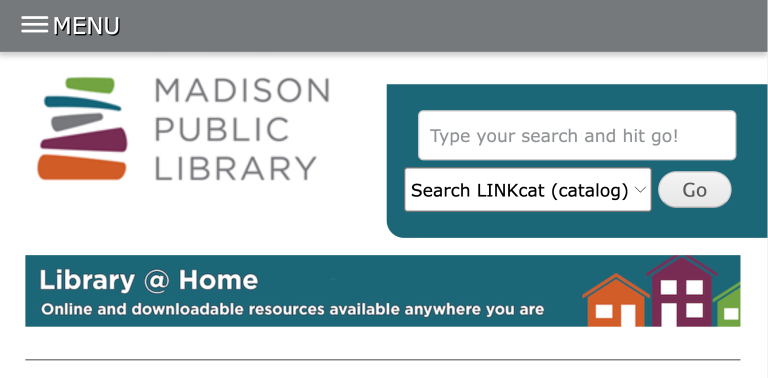
- Use high-quality images that won’t blur when magnified
- Avoid using images of text, which might pixelate
- Give content enough space (between paragraphs, between lines of text, around images and other elements, etc.) to support enlarging the content
Readability
Make sure your message reaches a wide audience by considering the readability of your content. Use plain language by avoiding jargon, spelling out acronyms on first use, and keeping paragraphs and sentences short. You can use tools like the Hemingway App to check and adjust the reading level of your content. For most public-facing content, we recommend a 9th-grade reading level.
Content structure and styling can also enhance readability. Use descriptive, unique headings for different content sections to help readers skim content to find what they need quickly. Bullet points and content summaries also make content more digestible. When using bullet points, be sure to tag them as unordered lists or use the bullet points from the styles panel in document editors so that they are described accurately by screen readers.
Give all of your content the space it needs. Cluttered, dense content can quickly become overwhelming and add to the audience’s cognitive load. Try to present your audience with a manageable amount of information by grouping related content together in content blocks and leaving sufficient blank page space between sections and lines of text.
- Use plain language
- Support skimming with good headings, bullet points, and content summaries
- Communicate content sections through visual design
Alternative text and image descriptions
The goal of alternative (alt) text and image descriptions is to communicate not only the “what” of an image, but the “why”—the meaning the image gives to our visual audience.
Alt text
When reading normal text, screen readers can go slowly, reading each line, word, or even letter. But for picture descriptions, they read the whole thing at once. If the user misses a detail, they have to listen to it all again from the start. Because of this, it’s best to keep picture descriptions short — 150 letters or less. Don’t use extra words like “image” or give too many small details about the picture.
- Keep alt text to 150 characters or fewer
- Describe the “why” of the image as well as the “what”
- Keep alt text and image captions unique
- Use longer image descriptions for more complex images
Consider the following example:

Excessively long alt text:
A picture of Bascom Hall with red and white UW–Madison Banners at the top of Bascom Hill on a bright and sunny day. There are trees whose leaves are turning orange and yellow and several people are walking through the grass.
Good alt text for an article about campus and its buildings:
Bascom Hall proudly displaying a bold W banner at the top of Bascom Hill.
Good alt text for an article about the start of the new school year:
Students walking in the grass in front of Bascom Hall on a crisp fall day.
Alt text vs captions
Alt text supports screen readers and is hidden for sighted readers. Use them to briefly describe the image.
Captions give information about the image to all readers. You can use them to augment your storytelling, share context about the image subjects, and credit the image creator or source.
Image descriptions
Images like infographics and charts contain a lot of information. These complex images usually need more than 150 characters to describe. In those cases, we recommend creating longer image descriptions instead of alt text. Image descriptions are part of the body copy of a web page or document, giving screen reader users more flexibility. Image descriptions can also benefit all audience members, describing the main takeaways of a complex image.
- Add longer image descriptions to the main text of the page
- Describe major themes or takeaways from the image
Tables
You should use tables to share data or other information that can be sorted into rows and columns. Screen readers announce content in tables in a very specific way, so do not use tables for layout or visual design purposes.
- Set heading rows or columns to label data in the table
- Avoid complex tables with multiple heading rows
- Contextualize tables within the content of the surrounding page
If you’re including a table with specific information, it can be useful to provide quick data summaries. Additionally, providing these summaries and a heading for your table can help everyone better understand the data they are about to investigate.
Consider the following examples of degree requirement lists. In the first example, the table lacks headings and contains complex formatted data within the cells, both of which can make it difficult for screen readers to interpret the content. The bulleted list on the right contains the same information and keeps the labels and requirements in line with each other.
Before: Degree requirements
| General education |
|
| Major | At least 27 credits
|
| Remaining credits are elective | |
| Total | 120 credits |
| Required GPA | 2.0 overall |
After: Degree requirements
120 credits
- General Education (15 credits)
- Humanities – 6 credits
- Natural science – 6 credits
- Social studies – 3 credits
- Major Requirements (At least 27 credits)
- Intro – 6 credits
- 300 – 9 credits
- 400 – 9 credits
- 500 – 3 credits
- Language (9 credits)
- Electives (Remaining credits)
2.0 GPA
Another way to avoid complex tables is by rethinking the organization of the information in the table. Sometimes reorganizing the headings or breaking the information into more than one table can simplify the presentation. In the following example, notice how using the days of the week as the column headings simplifies the layout of the table.
Before: Group class schedule
| Sunday | ||
| 9:00 – 9:45 | 10:00 – 10:45 | 11:00 – 11:45 |
| Class A | Class B | Class C |
| Monday | ||
| 9:00 – 9:45 | 10:00 – 10:45 | 11:00 – 11:45 |
| Class B | Class C | Class A |
After: Group class schedule
| Hours | Sunday | Monday | Tuesday | Wednesday | Thursday | Friday | Saturday |
| 9:00 – 9:45 | Class A | Class B | Class A | Class C | Class A | Class B | Class A |
| 10:00 – 10:45 | Class B | Class C | Class B | Class A | Class B | Class C | Class B |
| 11:00 – 11:45 | Class C | Class A | Class C | Class B | Class C | Class A | Class C |
Links and buttons
Links and buttons help users navigate digital content. Clear labels tell users what to expect when using a link or button. Those labels also help people using screen readers understand the purpose of a link or button without having to read the text around it.
Links take users to new content
- Use unique, descriptive text
- Example: “Our majors and certificates” is better than “Read More”
Buttons perform actions
- Use concise text, often starting with a verb
- Example: “Submit application” is better than “Click here to submit”
Styling:
- Make links stand out (typically blue and underlined)
- Ensure good contrast between the link and regular text (3:1 contrast ratio minimum)
Best practices:
- Open new content in the same tab when possible
- Warn users in the text or using HTML tags if a link will open a new tab or window
- Warn users if a link will open or download a special file type like a PDF
Consistent help and accessibility statements
Accessibility statements show your audience that you’ve anticipated their needs and provide them with resources to navigate your content. Accessibility statements can include the standards we strive to meet (WCAG 2.1 AA), known accessibility barriers, technical requirements such as browsers or operating systems, and contact information for questions or reporting barriers. The W3C Web Accessibility Initiative created an accessibility statement generator to help you get started.
If you often include contact information, self-service resources, or other user support documentation throughout your website or documents, be consistent about where that information appears in your content (e.g., in a page footer, in a persistent content block at the top of a page, etc.) to help users find that information.
- Provide an accessibility statement
- Include user support information in a consistent spot in your content
The Center for User Experience
At the Center for User Experience, we are committed to working with you to make digital spaces more accessible, usable and inclusive for all students, faculty and staff at UW–Madison. We help the university follow its Digital Accessibility Policy by offering free evaluation and consultation services to all UW–Madison community members.
Get in touch
- Meet with us: Book a quick chat with one of our team members to ask any questions you have.
- Start a project with us: We support accessible design and development. Fill out our Let’s Connect form to begin working with us on your project or to request an accessibility evaluation.
- Email us: Not sure if you’re ready to meet? Email us to start talking and figure out what to do next.